Are you curious about what makes your roof so effective at protecting your home? There are various parts that come together to strengthen your roof. One of those parts you might not know about is the rake of a roof.
As professional roofing contractors in Oklahoma, we believe homeowners should understand the role of these small parts in their homes.
In this guide, we will discuss everything about roof rakes, from their basic function to maintenance tips that can save you money in the long run.
We are here if you are looking for roofing services in Tulsa and the nearby areas in Oklahoma. Just give us a call at (918) 402-7167!
What Is the Rake of a Roof?
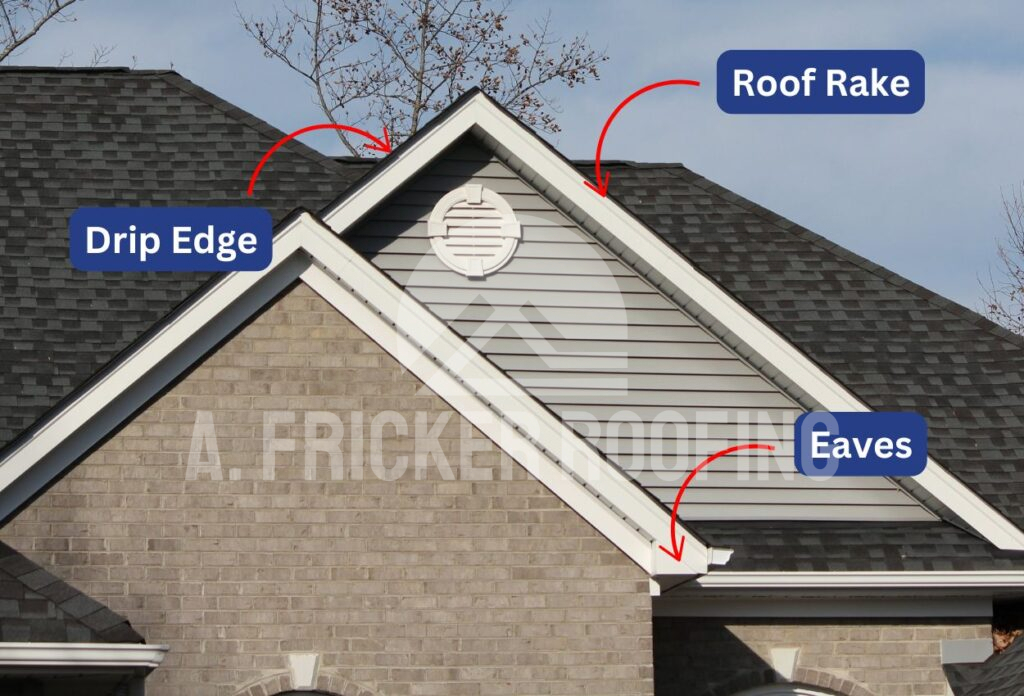
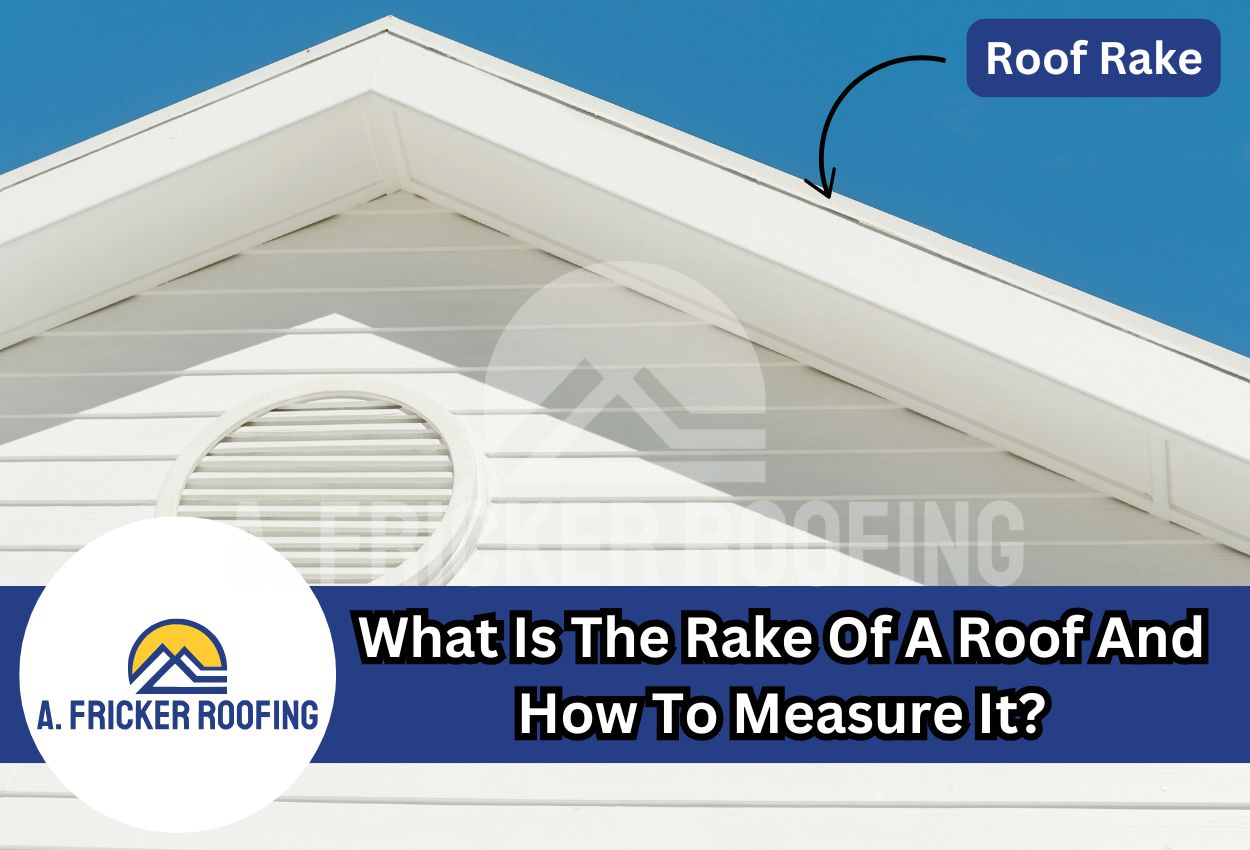
When you look at your home from the side, you’ll notice a sloped edge that runs along the gable end of your roof. This is known as the rake of a roof. It extends from the eaves (the bottom edge) all the way up to the ridge (the peak).
Many homeowners confuse this structural element with a roof rake, which is actually a tool used for removing snow. The rake of a roof serves as your home’s first line of defense against weather while adding a finishing touch to your roof’s appearance.
Why Are Roof Rakes Important?
The rake edge of a roof is particularly important as it’s where your roofing materials meet the gable end of your house. Here is why the rake is an important part of your roof:
#1 Helps With Rain Water Management
First and foremost, it acts as a protective barrier against the elements. When rain hits your roof, the rake helps channel water toward your gutters, preventing it from seeping into your home’s structure. This water management system is crucial for preventing expensive water damage repairs.
#2 Wind Impact Management
Beyond water protection, your roof’s rake plays a significant role in managing wind impact. During strong storms, wind can try to lift your roofing materials, but a properly installed rake helps maintain the integrity of your roof’s edge. This is particularly important in areas that experience severe weather conditions.
#3 Proper Attic Ventilation
Another benefit of a well-designed roof rake is its contribution to proper attic ventilation. The rake area often includes hidden ventilation components that help maintain proper airflow in your attic space, which is important for preventing moisture buildup and maintaining energy efficiency in your home.
But remember, proper installation is very important for the functionality of this roofing part.
A properly installed rake edge prevents water from seeping under your roofing materials and protects your home’s structure from moisture damage. Professional roofers often reinforce this area with flashing to ensure maximum protection.
What Are The Important Parts Of A Roof Rake?

Your roof’s rake system consists of several interconnected components that work together to protect your home.
#1 Rake Board
The rake board serves as the main covering along the roof’s edge, similar to how fascia boards work along the eaves but designed specifically for the sloped edge. Behind this, you’ll find the actual structural components that support the rake board and connect it to your home’s frame.
#2 Eaves
The eaves are simply the bottom edges of your roof that hang over the sides of your house walls. They work together with the rake, connecting at the corners where the sloped edge meets the straight edge. Eaves mainly protect your walls from rain, and you can also make them look nice with colored finishes or paint.
#3 Drip Edge
The drip edge is an important part of the rake system and is a metal flashing that directs water away from the vulnerable edges of your roof. This seemingly simple component prevents water from backing up under your shingles or seeping into your home’s structure.
#4 Starter Shingles
Working together with the drip edge, starter shingles create a secure foundation for the rest of your roofing materials, ensuring everything stays watertight and secure.
How to Measure the Rake of a Roof?
There are two common methods that roofers generally use to measure a roof rake. Here, we will take a closer look at both methods.
Method 1: Ground-Level Measurement
This is the safest way to measure the rake edge of a roof, and it’s perfect if you’re not comfortable climbing ladders.
Tools Required
1. Laser measure
2. Calculator
3. Notepad
4. Level
Here Are The Steps You Need To Follow!
👉 Step 1: Position yourself carefully at the corner of your house, making sure you can see the entire side of your roof clearly. Stand far enough back that you can see from the bottom edge all the way to where your roof meets at the ridge.
👉 Step 2: Take your laser measure and point it at the bottom corner of your roof where the rake begins. Make sure you’re holding the laser measure steady and level – even a slight shake can throw off your measurement. Write down the first number that shows how far you are from the house.
👉 Step 3: Next, aim your laser measure at the very peak of your roof where the rake ends. Take this measurement and write it down, too. You’ll want to measure both the height up to the peak and the distance from where you’re standing. These numbers help you figure out the true length of your roof rake.
👉 Step 4: To get the actual length of your roof rake, you’ll need to do a simple calculation. Think of your roof rake as making a triangle. Use the ground and height measurements you took to figure out the true length. Many laser measures can even do this math for you with a special roof mode.
Method 2: Direct Measurement
This method involves measuring the rake of a roof up close. While it gives you a very accurate measurement, you need to be extra careful to ensure your safety.
Tools Required
1. Tape measure
2. Safety harness
3. Ladder
4. Non-slip shoes
5. Helper
Here Are The Steps You Need To Follow!
👉 Step 1: Set up your ladder on firm, level ground. Place it at about a 75-degree angle against your house, making sure it extends at least three feet above your roof’s edge. Secure the ladder so it can’t slip sideways – this might mean having someone hold it steady for you.
👉 Step 2: Put on your safety gear, including non-slip shoes and a safety harness if you have one. The parts of a roof rake can be slippery, especially in the morning when there might be dew, so good shoes are really important. Make sure someone is spotting you from the ground.
👉 Step 3: Carefully climb up until you can reach the edge of your roof. Hook your tape measure onto the bottom edge where your roof rake starts. You want to make sure it’s firmly attached and won’t slip while you’re measuring.
👉 Step 4: While keeping the tape measure tight against your roof’s surface, carefully extend it all the way up to where your rake meets the peak of your roof. This gives you the true measurement of your roof rake, following the actual angle of your roof.
👉 Step 5: Take your measurement at least twice to make sure you got it right. Write down your numbers immediately – trying to remember measurements often leads to mistakes. If the two measurements are different, take a third one to be sure.
⭐ BONUS
4 Tips For Maintaining The Rake Of Your Roof
Regular maintenance of your roof’s rake can prevent costly repairs and extend your roof’s lifespan.
👉 Begin by visually inspecting your rake boards and edges at least twice a year, particularly after severe weather events.
👉 Look for signs of water damage, such as discolored or rotting wood, loose or missing shingles, and any separation between components.
👉 Keep trees trimmed back from your roof’s edge to prevent branches from scraping against the rake during storms. This simple step can help prevent damage to both your rake boards and roofing materials.
👉 During your regular gutter cleaning, pay special attention to the areas where your rake meets the eaves, as these junctions can collect debris and create drainage problems.
Also Read: The Ultimate Guide to Roof Trusses & Its Types
Call A. Fricker Roofing and Waterproofing For Professional Roofing Services In Tulsa, OK
If you are looking for durable and professional roofing services in Tulsa and the surrounding areas of Oklahoma, we are here to assist you. At A. Fricker Roofing and Waterproofing, we have a team of experienced and skilled roofers.
Our experts handle everything from small repairs to complete roof replacements, always using top-quality materials that stand up to Oklahoma’s tough weather. We take pride in doing things right the first time and treating your home like it’s our own.Ready to get started? Give us a call at (918) 402-7167 for a free, no obligation estimate. You can also fill out our quick online form, and we’ll get back to you within 24 hours.

