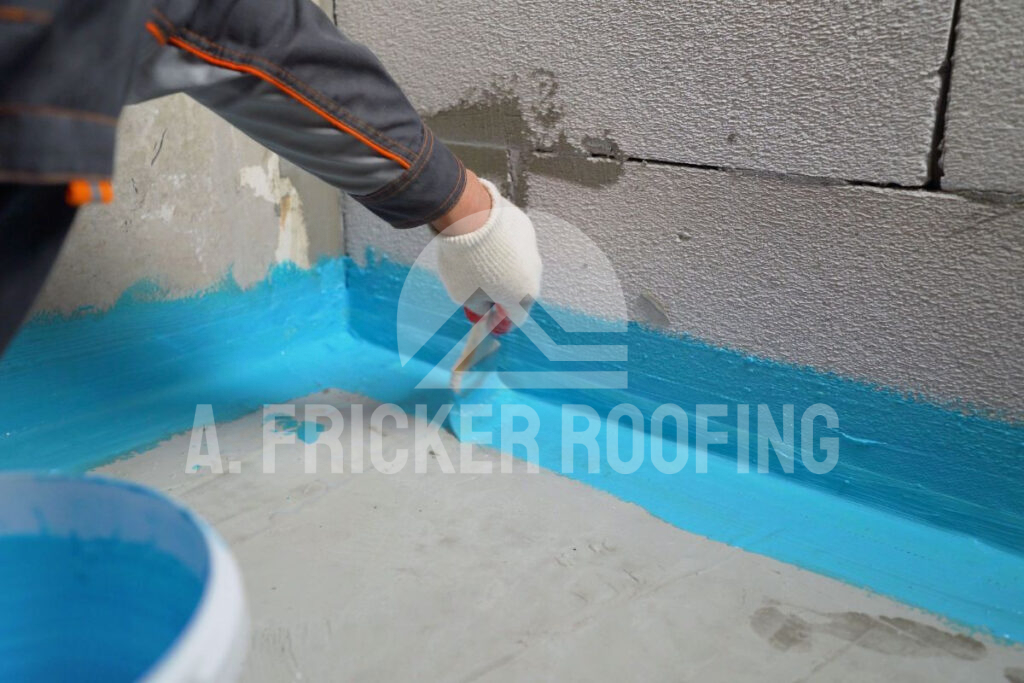
Waterproofing basement walls from the inside is a preventive solution to stop water damage to your home. This approach involves applying suitable waterproofing coatings on the basement interior walls. Many property owners mistakenly believe that waterproofing basement walls is ineffective. But this isn’t true.
In this blog post, we will highlight the benefits of waterproofing basement walls from the inside and the practical waterproofing methods. Continue reading through the end for everything you need to know.
What is Basement Interior Wall Waterproofing?
Basement wall waterproofing is a proactive approach to prevent moisture infiltration through walls inside the basement. Controlling moisture levels within the basement is important to prevent potential risks including mold growth.
Waterproofing basement walls from the inside involves applying barriers and sealants directly to the interior surfaces, effectively stopping water infiltration. Unlike exterior waterproofing, which focuses on preventing water from reaching the walls from the outside, interior waterproofing addresses water that has already penetrated the walls or is caused by interior condensation.
Why Waterproofing Basement Walls from the Inside Matters
Basements make up part of your home’s foundation and need to be equally taken care of as part of your home. Even though your basement may not be the most visited space, you must regularly check and clean it to keep it in good condition. Waterproofing basement walls from the inside is more than just a home improvement task—it’s an investment in the longevity and health of your home. Let’s explore why this process is so crucial.
1. Protects Your Investment
Basements, often used for storage or additional living space, are particularly vulnerable to water damage. If left unchecked, this can lead to severe structural issues, ruined belongings, and decreased property value. By waterproofing basement walls from the inside, you add an extra layer of protection, ensuring your home’s foundation remains solid and your investment is secure.
2. Health Concerns
Water penetration inside the basement brings dampness—a suitable condition for mold and mildew to thrive. Mold spores can cause respiratory problems, including asthma and allergies, and exacerbate existing conditions. Waterproofing the inside of basement walls helps prevent moisture buildup, reducing the risk of mold growth and creating a healthier living environment for you and your family.
3. Prevents Structural Damage
As said, the basement is a part of your home’s foundation. Your home’s integrity and structure rely on your foundation’s present condition. Water infiltration through the basement walls can cause significant damage to your home’s structure over time. It can weaken the foundation, leading to cracks and instability. By waterproofing basement walls from the inside, you can prevent water from entering your home and protect the structural integrity of your property.
4. Leads to Cost Savings
Addressing water problems in your basement sooner rather than later can save you a significant amount of money in the long run. The cost of waterproofing basement walls from the inside is relatively low compared to the expense of repairing extensive water damage or dealing with health issues caused by mold and mildew.
5. Provides You With Peace of Mind
Finally, there’s the peace of mind that comes from knowing your home is protected. Water damage can be a constant source of stress for homeowners. Taking proactive steps to waterproof basement walls from the inside lets you rest easy knowing you’ve done everything possible to protect your home from water damage.
How to Waterproof Basement Walls from the Inside

Waterproofing basement walls from the inside involves a strategic step-by-step process. By taking these steps, you can ensure your basement remains dry and functional. Here’s a detailed guide on how to waterproof basement walls from the inside.
1. Identify The Problem Areas In The Basement
a. Inspect Your Basement
Before you start the waterproofing process, thoroughly inspect your basement to identify where water is entering. Look for signs such as:
- Damp or wet walls
- Water stains
- Mold or mildew growth
- Efflorescence (white, chalky deposits on the walls)
- Musty odors
2. Clean and Prepare the Walls
a. Remove Mold and Mildew
If mold or mildew is present, clean it using a mixture of water and bleach (1:10 ratio). Scrub thoroughly with a stiff brush, and allow the walls to dry completely.
b. Clear Efflorescence
Remove any efflorescence with a wire brush. This chalky substance indicates water is seeping through the walls and bringing salts to the surface.
c. Patch Cracks and Holes
Use hydraulic cement to fill any cracks or holes in the walls. Hydraulic cement expands as it dries, providing a watertight seal that prevents water from entering through these gaps.
3. Apply Waterproofing Paint or Sealant
a. Choose the Right Waterproofing Product
There are various waterproofing products available on the market, such as masonry waterproofing paint. Select a product that is suitable for your specific needs.
b. Apply the First Coat
Using a paint brush or roller, apply the first coat of waterproofing paint or sealant. Make sure to cover the entire surface evenly and focus on areas prone to water infiltration.
c. Let it Dry
Allow the first coat to dry completely, following the manufacturer’s instructions for drying times.
d. Apply Additional Coats
For maximum protection, it is often recommended homeowners apply at least two to three coats of waterproofing paint or sealant. Check the product instructions and allow each coat to dry before applying the next.
4. Install a Vapor Barrier
a. Measure and Cut the Barrier
Measure your walls and cut the vapor barrier to fit. A vapor barrier is a plastic or foil sheet that covers your basement walls to prevent moisture from penetrating.
b. Attach the Barrier
Use adhesive or double-sided tape to attach the vapor barrier to the walls. Ensure there are no gaps or overlaps.
c. Seal the Edges
Use waterproof tape to seal the edges and seams of the vapor barrier, ensuring a tight fit.
Bonus Tip: Improve Drainage
a. Clean Gutters and Downspouts
Ensure your gutters and downspouts are clear of debris and functioning properly. Direct water away from your foundation to prevent it from seeping into your basement.
b. Install a French Drain
Consider installing a French drain, which is a trench filled with gravel and a perforated pipe. This helps redirect water away from your home.
c. Use a Sump Pump
If your basement is prone to flooding, install a sump pump to remove excess water quickly.
The Cost of Waterproofing Basement Walls from the Inside
The cost of waterproofing basement walls from the inside can vary significantly based on several factors, including the extent of the water problem and the methods used.
For a DIY approach, expect to spend a few hundred dollars on materials such as hydraulic cement, waterproofing paint or sealant, and a vapor barrier. This method requires an investment of time and effort but can be more economical.
On the other hand, hiring professional services can range from $500 to several thousand dollars, depending on the complexity of the job and the size of your basement.
Contact The Experts In Tulsa, OK, For Your Basement Waterproofing Project
For expert basement waterproofing services in Tulsa, OK, look no further than A. Fricker Roofing and Waterproofing. Specializing in both residential and commercial waterproofing solutions, we bring years of experience and a commitment to excellence to every project. Whether you’re dealing with minor dampness or significant water intrusion, our skilled team uses the latest techniques and high-quality materials to ensure your basement stays dry and protected.
Trust A. Fricker Roofing and Waterproofing to safeguard your home or business from water damage with our comprehensive and reliable services. Contact us today at (918) 402-7167 to address all your basement waterproofing needs.


