The ridge cap is the last step in finishing your metal roof. It seals the peak where two slopes meet and keeps out water, wind, and pests. This is especially important for dormer roofs, shed dormer roofs, and corrugated metal roofs, where gaps between panels can lead to leaks.
Installing a ridge cap involves prepping the roof, applying sealant, securing the cap, and following up with maintenance. This guide covers the full process, but for the actual installation, consult manufacturer instructions or hire a roofing professional like A. Fricker Roofing and Waterproofing.
Types of Ridge Caps for Metal Roofs
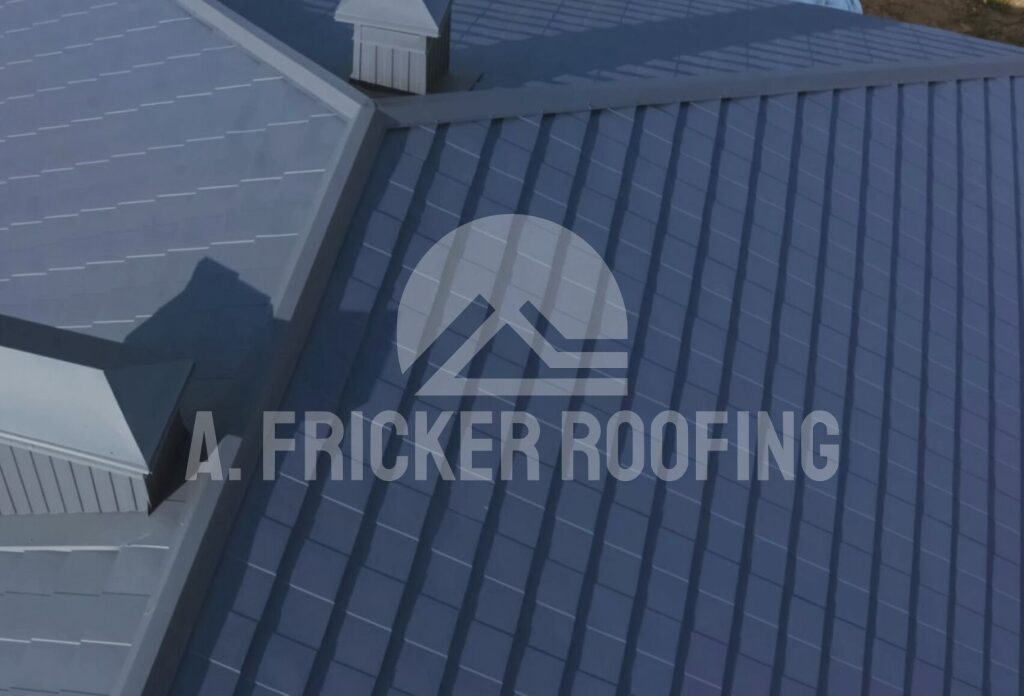
Not sure which ridge cap is right for your roof? It all comes down to your metal roof type, climate, and design. Get this wrong, and you could end up with leaks — or worse, trapped moisture that leads to mold. A customized ridge cap may be necessary for hip dormer roofs or dormer roof extensions.
- Standard Ridge Caps: Best for simple metal roofs. These flat or slightly angled metal pieces are affordable and easy to install.
- Vented Ridge Caps: Ideal for humid climates. Designed with slots or perforations, they allow airflow to prevent moisture buildup and mold.
- Custom Ridge Caps: Made to match your exact roofing panels, whether you have corrugated, R-panel, standing seam, steep slope metal roofs, complex angles, or decorative roof designs. They take longer to manufacture and cost more but provide precision and durability.
Tools and Materials Needed
The right tools and materials ensure a secure, watertight ridge cap installation.
Essential Tools
- Cordless drill with metal bits – Drives screws efficiently through metal panels.
- Metal snips (aviation snips for precision cuts) – Helps trim ridge caps and closure strips cleanly.
- 25-foot measuring tape – Necessary for accurate cuts and alignment.
- Chalk line with powder – Creates a straight guide for proper cap placement.
- A rubber mallet – Useful for adjusting metal pieces without damaging them.
- Caulk gun – Applies sealant neatly to prevent leaks.
Must-Have Materials
- Ridge cap pieces – Standard lengths between 10 and 20 feet, allowing for plenty of coverage with proper overlap.
- Butyl sealant tape – A 1-inch-wide, weatherproof sealant that keeps moisture out.
- Closure strips – Available in solid or vented styles, made from foam or rubber, to fill gaps under the ridge cap.
- Metal roofing screws with neoprene washers – Prevents rust and make sure a watertight seal.
Tip: Stick with high-quality caps, high-grade sealant tape, and rust-resistant screws. Cheap materials corrode quickly, leading to leaks and costly repairs.
Safety Precautions For Metal Ridge Cap Installation
Metal roofs aren’t the safest place to mess around. They can be slippery, sharp, and get hot in the sun. Before you even think about climbing up there, make sure you’ve got the right gear and a solid plan.
Wear the Right Safety Gear
Always wear safety glasses to protect against flying metal shards when cutting panels. Heavy-duty gloves prevent cuts, and slip-resistant boots improve grip on smooth metal surfaces.
Use a Ladder Properly
Set your ladder on solid ground, and don’t try to balance it on anything. Extend it at least 3 feet past the roof edge, so you have a good handhold. Never overreach — move the ladder instead of stretching too far.
Plan for Safe Weather Conditions
Metal roofs become dangerously slick when wet, and strong winds can throw you off balance. Avoid working on rainy or windy days. In extreme heat, metal can burn your hands, so schedule work when temperatures are between 50 and 80 degrees Fahrenheit for the safest conditions. Picking the right weather prevents accidents and makes the job easier.
Move Safely on the Roof
On steep slopes, use a safety harness or roof jacks for added security. Instead of standing upright, crawling or scooting helps distribute weight evenly and prevents slipping.
Preparing the Roof for Ridge Cap Installation
Before installing your ridge cap, you need a clean and even surface. Here’s how to get your roof ready:
Clean the Ridge
You should clear off any dirt, leaves, or old sealant before getting started. A broom or a leaf blower works great for loose debris, but if you’ve got old butyl tape or caulk, grab a scraper or putty knife and remove it. A smooth surface means better adhesion and a tighter seal.
Inspect for Damage
Check for rust, dents, or loose screws. If you spot rust, sand it down and apply a metal primer to stop it from spreading. Loose fasteners should be tightened or replaced so nothing shifts under the ridge cap once it’s installed.
Measure the Ridge
To get the right fit, measure the ridge from end to end. Add 2 to 4 inches per side for a proper overhang. If you’re wondering how many ridge caps you’ll need, divide the total ridge length by 10 feet (since each piece overlaps by about 6 inches). A little extra planning now can prevent problems later.
Mark Straight Guidelines
A crooked ridge cap can lead to poor sealing, so grab a chalk line and snap a straight guide along the ridge. Start at one end, center a ridge cap, and mark the edges. To keep everything aligned, snap new lines every 15 to 20 feet. This simple step keeps your ridge cap straight and secure.
Once your ridge is prepped, you’re ready to start sealing and installing the ridge cap.
Step-by-Step Ridge Cap Installation Guide
A ridge cap only works if installed correctly. Gaps, poor sealing, or weak fasteners can lead to leaks, rust, and wind damage. Follow these steps for a secure, weatherproof fit.
Step 1: Apply Sealant Tape
Butyl sealant tape acts as a waterproof barrier, sealing small gaps between panels and closures to avoid leaks.
How to Apply It:
- Lay a 1-inch-wide strip of butyl sealant tape along both sides of the ridge, about 1 inch above the chalk line, ensuring an unbroken seal.
- Press it down firmly using a gloved hand or roller to maximize adhesion.
- If temperatures are below 40 degrees Fahrenheit, gently warm the tape with a heat gun to improve its stickiness.
Without proper metal sealant, wind-driven rain can seep under the ridge cap, leading to leaks and rust. This extra waterproofing layer protects your roof from heavy storms and extreme weather.
Step 2: Place Closure Strips
Closure strips protect against water, debris, and pests while also providing support for the ridge cap. The right type depends on your climate: solid strips work best in dry, windy areas by sealing out dust and drafts, while vented strips allow airflow in humid climates to prevent moisture buildup.
How to Install Them:
- Align the closure strips directly over the sealant tape, positioning the outer edge 1/4 inch above the chalk line toward the peak.
- Press them down firmly to bond with the sealant. For corrugated or ribbed panels, make sure the strips match the panel contours exactly to prevent gaps.
- Apply a second layer of sealant tape on top, but leave the backing on until the ridge cap is installed.
Closure strips create a protective barrier under the ridge cap, keeping out rain, insects, and debris. Without them, open gaps can allow moisture intrusion, pest infestations, and eventual structural issues.
Step 3: Install the Ridge Cap
Once your sealant and closure strips are in place, it’s time to secure the ridge cap for a watertight finish.
How to Install It:
- Start at one end of the ridge and center the first cap piece over the peak, with a 2 to 3-inch overhang on both sides.
- Align it with the chalk lines and secure it with metal roofing screws.
- Screw through every other major rib (spacing 9 to 12 inches apart) using low torque to prevent metal warping.
- Overlap each cap piece by 6 inches, sealing the joints with butyl tape or caulk.
- Work sequentially down the ridge, using a rubber mallet to tap pieces into place gently.
- For end caps, fold down the excess metal or install trim pieces to block wind and water.
Proper screw placement and overlap prevent the ridge cap from lifting in strong winds and stop water from sneaking into seams. Folding or trimming the ends gives a clean finish while sealing off open edges. Rushing this step can lead to loose sections, leaks, and premature roof damage, so take your time and secure it right.
Troubleshooting During Installation
Even with careful installation, mistakes happen. Uneven gaps, leaks, and misaligned screws can cause long-term roof issues if not fixed right away.
Uneven Ridge Cap Fit
If the ridge cap wobbles or sits unevenly, check for bent panels or debris along the ridge. A rubber mallet can flatten minor panel bends, while a quick sweep removes dirt and old sealant. If the closure strips are too thick, trim them slightly so the cap sits flush.
Leaks at Overlaps
Overlaps should be at least 6 inches to prevent water intrusion. If leaks occur, test with a hose and look for seepage. Add extra butyl sealant tape at the joints. If the overlap is too short, loosen the screws, adjust the cap, and re-secure it properly.
Loose or Stripped Screws
If a screw won’t tighten, the hole may be stripped. Drill a new pilot hole slightly to the side and insert the screw there. Tighten screws just enough to compress the neoprene washer, over-tightening can warp the metal and create leaks.
Misaligned or Wavy Cap
If the ridge cap isn’t lining up with the chalk line, loosen the screws, realign it, and re-secure. Over-tightened screws can pull the metal out of shape, so back them off slightly before re-tightening.
Ventilation and Insulation Considerations
A ridge cap does more than seal the peak — it also affects attic airflow and temperature control. Choosing between a vented or solid ridge cap depends on your climate and insulation setup.
Why Ventilation Matters
Vented ridge caps, when paired with soffit vents, allow hot, humid air to escape from the attic space. This reduces the risk of condensation, mold growth, and rust — especially in humid climates. Without proper airflow, moisture gets trapped in the attic, potentially leading to long-term damage.
Solid Ridge Caps & Insulation
If your attic doesn’t have a vapor barrier, a solid ridge cap can trap heat, leading to moisture buildup, mold, and even ice dams in colder climates. In hotter regions, it can make your home harder to cool, driving up energy costs. Before installing, check your metal roof insulation setup to make sure it allows for proper moisture control and ventilation.
Finding the Right Balance
While ventilation prevents moisture problems, too much airflow can cool the roof too much in winter, increasing heating costs. If you’re unsure what works best, consult local building codes or a roofing professional.
Cost Considerations and Budgeting
Installing a ridge cap involves material costs, tools, and labor — whether you do it yourself or hire a pro. Planning ahead prevents unexpected expenses.
Material Costs
Ridge caps typically cost $5 to $15 per linear foot, depending on the material. Steel is more affordable, while aluminum resists corrosion better but for a higher price. Vented ridge caps cost more than solid ones.
For a 30-foot ridge, expect to spend $150 to $450 on materials, plus $20 to $50 for butyl sealant tape and closure strips. Buy extra ridge cap length to account for cutting mistakes.
Tools: Buy or Rent?
If you don’t have the tools, buying the basics (drill, snips, chalk line, caulk gun) may cost you $50 to $100. Renting tools for a one-time job costs about $20 to $30 per day or more depending on your location and what tools you need.
DIY vs. Hiring a Pro
DIY installation can save $200 to $500 in labor, but hiring a professional ensures proper sealing and warranties. If your roof has steep angles or custom cuts, a pro may be the better option.
Buy Extra to Avoid Shortages
Always buy extra ridge cap length to account for mistakes or misalignment. Running out of materials mid-job can cause delays and mismatched pieces. It’s better to return unused materials later than risk stopping mid-project.
Post-Installation Maintenance Tips
A properly installed ridge cap can last for decades, but regular metal roof maintenance prevents leaks and damage and helps avoid expensive repairs.
Inspect the Ridge Cap Regularly
Check the ridge cap twice a year (spring and fall) for loose screws, dents, or worn-out sealant. After severe weather, inspect for shifting or damage.
Keep the Ridge Cap Clean
Leaves, dirt, and moisture trap water, leading to rust. Use a soft broom or garden hose to remove debris, but avoid pressure washers, which can damage sealant and loosen screws. Also, keep gutters clear to prevent water backup.
Repair Small Issues Before They Get Worse
Reapply butyl tape or roofing caulk if the sealant cracks or shrinks. Tighten screws without over-tightening, as crushing the washer can cause leaks. Replace bent or dented cap sections before they allow water in.
Maintain Proper Ventilation for Vented Ridge Caps
For vented ridge caps, check for leaves, dirt, or bird nests blocking airflow. Keeping vents clear prevents moisture buildup and mold while improving attic ventilation.
Unsure About DIY? Get Professional Metal Ridge Cap Installation In Tulsa, OK
A ridge cap does more than just finish the look — it keeps water, wind, and pests out while helping your roof last longer.
Take your time with prep, sealing, and securing, and you’ll get a solid, leak-free result. Skipping steps can lead to problems down the road.
Not feeling confident about tackling this yourself? Call A. Fricker Roofing and Waterproofing at (918) 402-7167 and let the pros handle it. You’ll get a solid, leak-free ridge cap installation for your metal roof without the hassle.
FAQs About Ridge Cap Installation
A: A 30-foot ridge may take two to four hours, depending on experience. Prep work adds time, and first-timers may need longer.
A: Yes, but it is not usually recommended. Covering an old ridge cap can hide issues like leaks and make it difficult to fix future problems.
A: Use transition pieces or custom-cut caps. Standard ridge caps won’t fit well on steep angles. For tricky cuts, professional help may be best.
A: Spray the ridge with a hose and check inside for leaks. Focus on overlaps and screws. If water seeps in, add more sealant.
